NOTE : This is the first in a series of about a decades-worth of notes (not an exaggeration) I’ve been meaning to type up and store somewhere, but haven’t had the/any free time. Having just moved back to the U.K., and being theoretically a gentleman of leisure for a couple of weeks, it’s now – if ever.
DLNA is fantastically useful. The convenience of being able to play via any of your screens over the network (or just from a USB hard drive) is a giant leap in terms of convenience over carrying huge amounts of DVD/Bluray discs around (literally around the world in my case, having just moved back from Australia after 12+ years – I have crates of them still in storage in Sydney).
Format support can however be spotty, especially when dealing with lossless soundtracks. The Playstation 4, for instance, won’t even play DTS over the network, let alone DTS-MA or TrueHD. So here is a guide on how to create archive versions of your media files containing lossless versions of the soundtracks.
Why you might do this
I use FLAC for soundtracks. Why would I do this? There are three lossless formats generally in wide use at present, uncompressed Linear PCM, and compressed DTS-MA and Dolby TrueHD. I’ve converted all of these to FLAC for almost all of my rips. DTS-X and Dolby Atmos are not covered here, as they are very different, in that rather than being studio-mixed around a certain speaker layout they are mixed at the point of, and to match, the listener’s environment (with the exception of a >=7.1 channel track to provide ambience).
LPCM is fine, but larger than FLAC due to it’s uncompressed nature (and thus takes up more bandwidth when sending over a network). It also lacks some features of FLAC, including error checking.
DTS-MA has several disadvantages. Firstly, it is proprietary. Secondly, even if it’s the case that your player and receiver can deal with the lossy (“core”) DTS part of the audio stream (no sure thing – see, once again, the PS4), it is likely that the extra chunks used to restore the missing parts of the audio to recreate the lossless audio stream (added using the “XLL” extension – see section 8 of this document) will be – at best – ignored, as will extra channels beyond 6.1 (see the “XXCH” extension in section 6.4 of the same document). If by any chance lossless audio is supported, then the stream must be reconstructed, giving rise to overhead in terms of bandwidth and CPU usage. Due to a quirk of the format the output is always reconstructed at its maximum possible size – 24bit 192kHz with 7.1 discrete channels – with the unused space padded out with silence. This is too much for the many devices that cannot push out that much data over HDMI (especially over older pre-1.3 versions of the protocol), and is mostly unnecessary. Very few commercial soundtracks exploit the maximum bandwidth available (if you know of any feel free to drop me a line).
TrueHD is also proprietary. It’s less problematic than DTS-HD, in that it does not contain a core AC-3 stream to re-integrate – rather the lossless version is carried as a stream separate to the lossy version. Once again though, it takes a fair bit of CPU power to decode.
For slower machines (older Raspberry Pi’s, as an example) this means conversion is the only game in town for compressed lossless audio soundtracks (it helps that LPCM has been part of the HDMI standard since the beginning in order to allow format decoding on the player). I have had this running in the past on a model B using Raspbmc/XBMC (later renamed to OSMC/Kodi) connected to my processor and playing lossless soundtracks flawlessly (HDMI versions prior to 1.3 may have issues with 7.1 LPCM soundtracks). The CPU usage remains light enough not to be overwhelming when converting FLAC to LPCM in software and no hardware conversion is required. Should it be necessary any downmixing can also be performed here without the risk of melting your Pi’s CPU (e.g. 7.1 -> 5.1 or stereo). It may be possible to do the conversion in software at runtime using later model Pi’s (I haven’t tried), but it’s an extra stage you do not need, especially if your target player needs reconversion to a natively supported format e.g. AC-3 or AAC.
FLAC ticks all the boxes in that it is quick to decompress, fairly ubiquitous and an open-source format which is not likely to go away anytime soon, making it ideal for both archiving purposes and for playback on resource-constrained systems.
Why you might NOT want to do this
For DTS-MA and TrueHD this is, for all intents and purposes, a one-way conversion. While it may be possible to re-encode as TrueHD or DTS-MA there is no guarantee you will be able to convert back to a bit-exact copy of your original source (though TrueHD/MLP is likely to be easier than the DTS route, as it avoids the lossy compression altogether). If you are worried about bit exactness, preserving metadata and the like then ensure you keep your original disc (in fact I’d recommend you do this anyway, though as anyone who suffered through the laserdisc disc rot saga would tell you, keeping the physical media is no guarantee) and back up your original/intermediate files somewhere safe. The FLAC “–keep-foreign-metadata” option may help (unverified), but is beyond the scope of this post.
With regard to playback the situation can also get a bit difficult. While the CPU load involved in decoding FLAC is minimal, many backends will also attempt to transcode the video along with the audio, even when the video output is supported natively on the target (e.g. h264 on Chromecast), rather than simply converting the audio and re-muxing. Whilst this can be to a degree avoided by ensuring both the server and player are compatible (e.g. using Plex for both), or using Kodi/Videostream/VLC as a converter/frontend, it’s as well to check this end-to-end yourself beforehand (also check the screen size of the target device is large enough for the video, and check the video bandwidth is set to maximum). I’m currently using an ODroid XU4Q as a server – I’ll put up another post detailing the in’s and out’s of this at a later date. It’s as well to check this will not be an issue for you before irrevocably committing yourself to converting all your files, especially if you don’t fancy editing DLNA player profiles.
How to do this
There are a couple of methods of performing this conversion. Previously converting DTS-MA required using MakeMKV with an extra .DLL to be downloaded (see here). This DLL is no longer required, and – maybe not coincidentally – DTS-MA is now also supported by ffmpeg. I meant to do this myself at some point, but all things come to those who prevaricate. Ahem.
As a consequence MakeMKV no longer requires any extra software, but I’ve included instructions on how to use it as it provides a nice friendly GUI interface and integrates the AACS decryption step should it be necessary. If you’re ripping direct from Blu-ray this is the place to start, though it will accept already created Matroska files as input should you wish to convert previously created rips. If you want to convert already ripped files stored in a different container format (.mp4 and the like) jump ahead to the section detailing how to use ffmpeg at the commandline. This is also currently the only option to convert files on non-x86 machines.
The MakeMKV method
Download and install MakeMKV. It looks to be in perpetual free beta status but you can buy a license to ensure continued development.
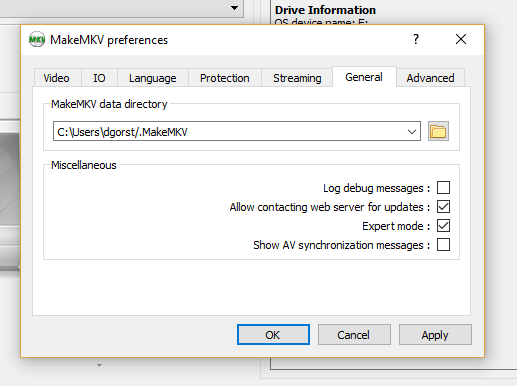
Under the View/Preferences menu enable “Expert mode” :
Select and open your source file or Bluray disc :
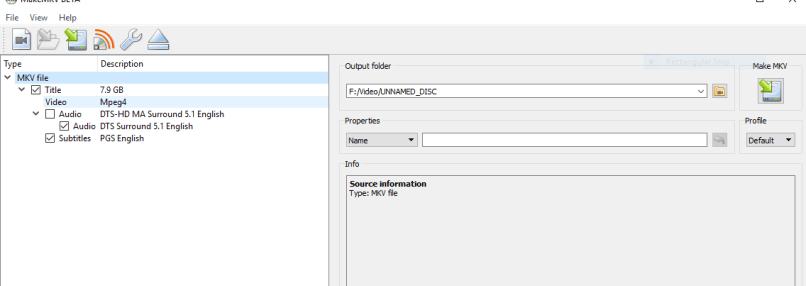
Now select the relevant lossless soundtrack and set the profile to FLAC :
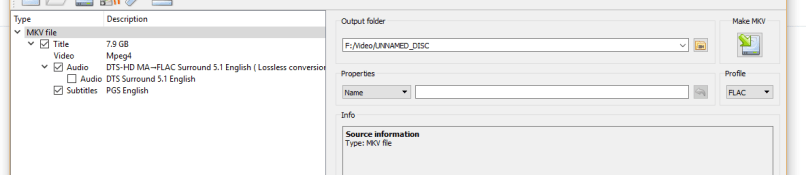
Edit any metadata here. This is also a good opportunity to remove any unnecessary subtitles or cover pictures if you’re looking to save space. Note that this will remove the DTS core soundtrack. Re-enable it if you wish to preserve it. Now hit the start button in the “Make MKV” panel :
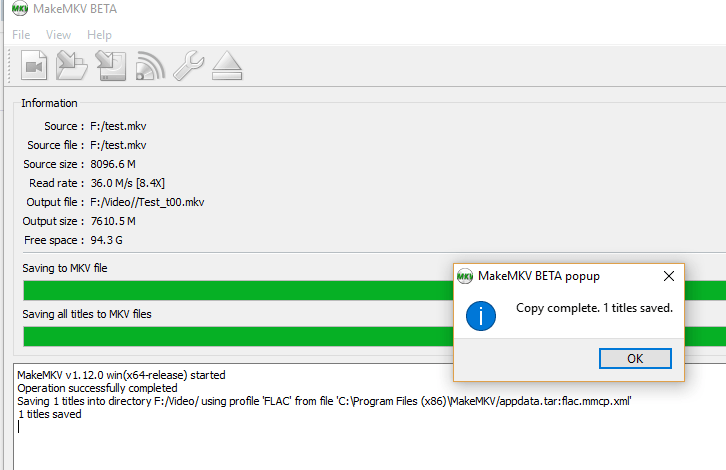
We now have our newly FLAC’ed output file. Due to the flatter format (and possibly better compression) we’ve also shaved around half a GB from our output file (8,489,995,617 bytes -> 7,980,226,213 bytes). Success!
The FFmpeg method
Firstly run ffprobe (or ffmpeg with no output parameters) to determine the contents of your source file.
ffprobe -i 'input.mkv'
This will list the video and audio tracks comprising the file. Find the lossless DTS-MA/TrueHD track in your language that you wish to convert. If you require only a particular stream, or wish to perform multiple conversions check here for info.
Stream #0:1(eng): Audio: dts (DTS-HD MA), 48000 Hz, 5.1(side), s32p (24 bit) (default)
The following assumes that you have a single input audio stream and don’t want the subtitles :
ffmpeg -i 'input.mp4' -vc copy -ac flac -sn output.mkv
You should now have a correct Matrsoka container with lossless audio. Verify with ffmpeg (as above) or mediainfo and you’re away!